
Adding a comparison table to Amazon affiliate products reviews can help readers make more informed choices when purchasing products. Comparison tables list the features of different products and allow readers to see which one is best for them. By adding a comparison table, you can ensure that your Amazon affiliate product reviews are accurate and helpful, you can help your readers quickly and easily find what they’re looking for. This information can be invaluable in helping them make informed purchases.
This simple addition can help readers compare the prices, features, and ratings of different products. By providing this information, Amazon affiliate reviewers can provide an objective perspective on the products they are reviewing. Comparison tables are easy to add to Amazon product reviews and can be found in the Review Criteria section of most product pages.
Comparison tables are a great way to increase click-thru rates and in this way increase your affiliate commissions.
Comparison tables are an easy way to add value to your Amazon affiliate product reviews and in this way rank higher on Google with your best products articles.
1. Choose two or more products that are similar in terms of features and benefits. If possible, choose products from the same category so readers can compare them easily. After you choose the products you should think of the features to add to the comparison table.
2. Format the table so that each row includes information about one product and each column includes information about another product. This will help readers compare the features and benefits of each product easily.
3. Include headings in the table that list the features and benefits of each product, making it easier for readers to find what they’re looking for.
4. Include images in the comparison table іf possible. Images are a great way to help readers find specific items quickly.
5. Be sure that the comparison table is responsive and looks good on desktop and mobile. You want a nice design for your comparison table so you can differentiate the important products from the rest and make them attractive for visitors.
In this section, we are going to see how easy is to add your comparison table to your post with AAWP Plugin. This is a WordPress plugin that can easily help you add Amazon affiliate products to your posts, it can help you add nice boxes or images, also has a feature that can help you add comparison tables. I have written an AAWP Review in the past that you can check to see exactly how it can help you.
You need to have the AAWP plugin set up, you just go and download the plugin from their website and add the license key and amazon API details. These are needed so the plugin to be able to connect to Amazon API and fetch the price, image, or review. To be under Amazon guidelines you need to fetch the price and images with their API and update them constantly (a thing that AAWP does).
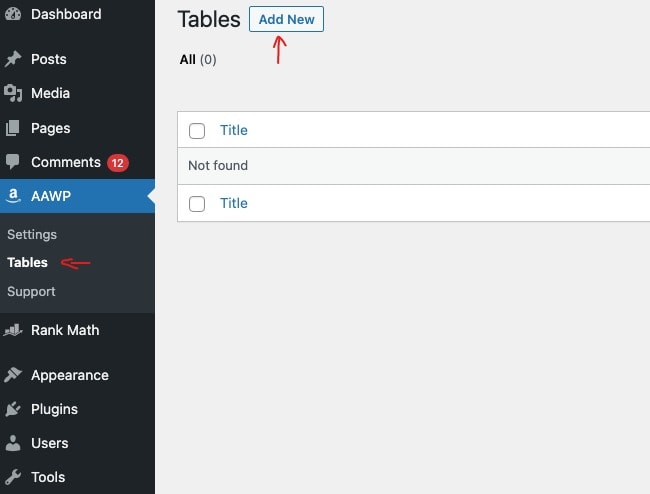
Next on the list is to go and add the actual table, for this you need to go under AAWP – Tables and hit Add New
In this section, you will add your products and create the table with features and things it needs. Now let’s dive and see exactly the sections that you need to complete so you can add your comparison table.
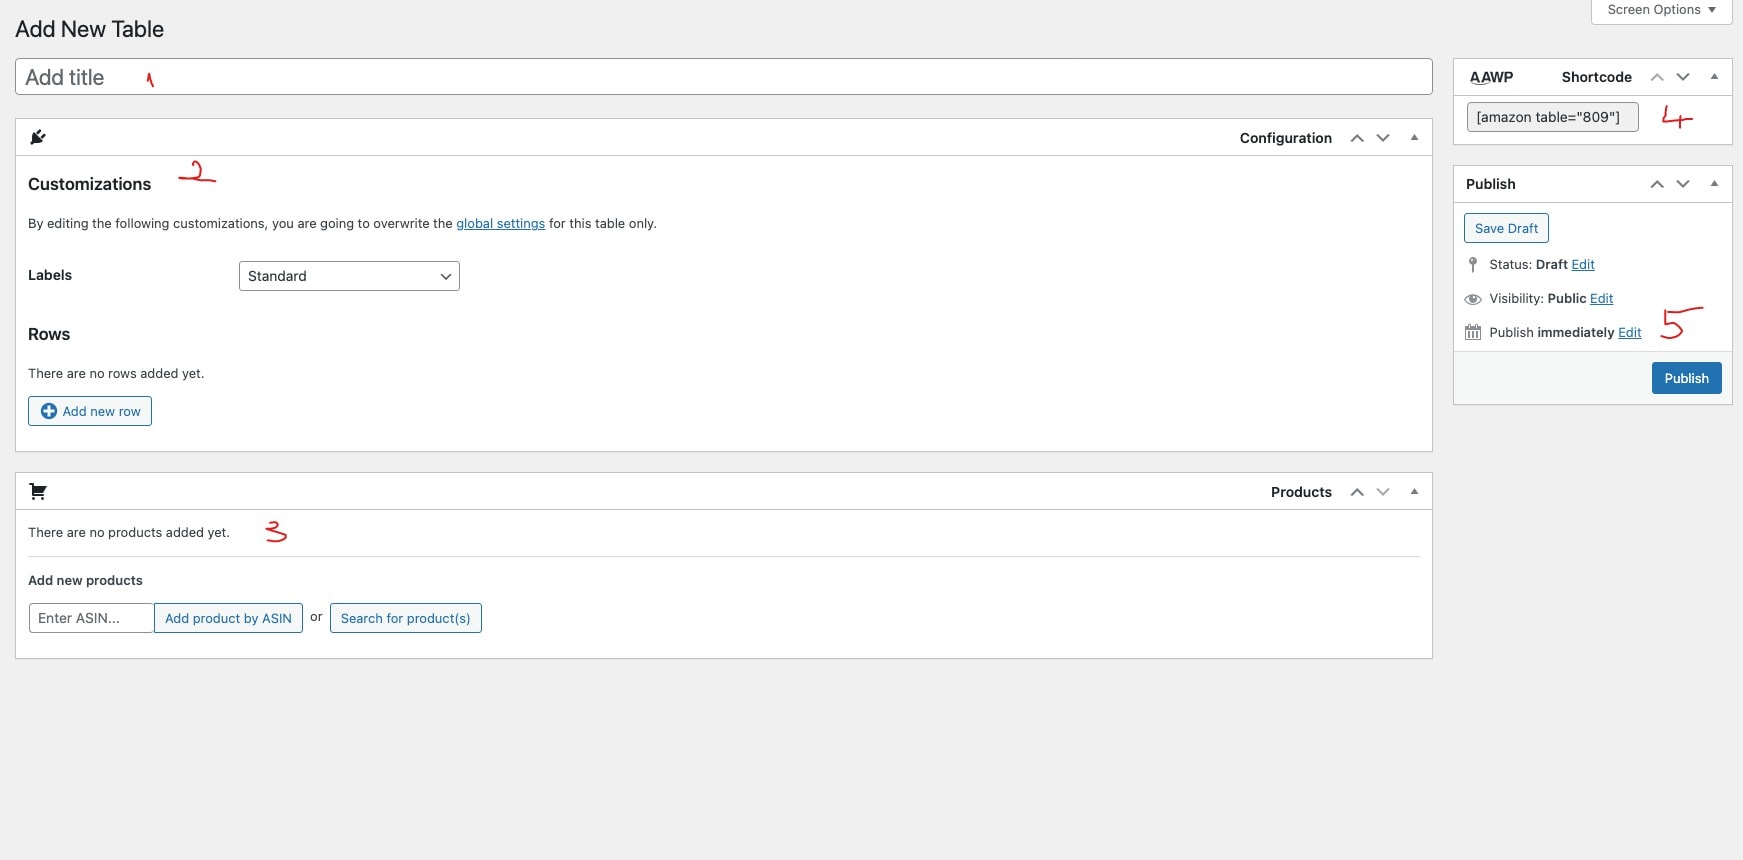
In this section, you just add a title to your table to see it in the Settings – Table area and easily distinguish it. For instance, I have a post with the best glass-lined thermos and I named my table Glass Thermos.
In this section, you will define which rows your table should have, this is the part where you insert the features you have chosen to be included in your table. For instance, for my Glass Thermos I have something like:
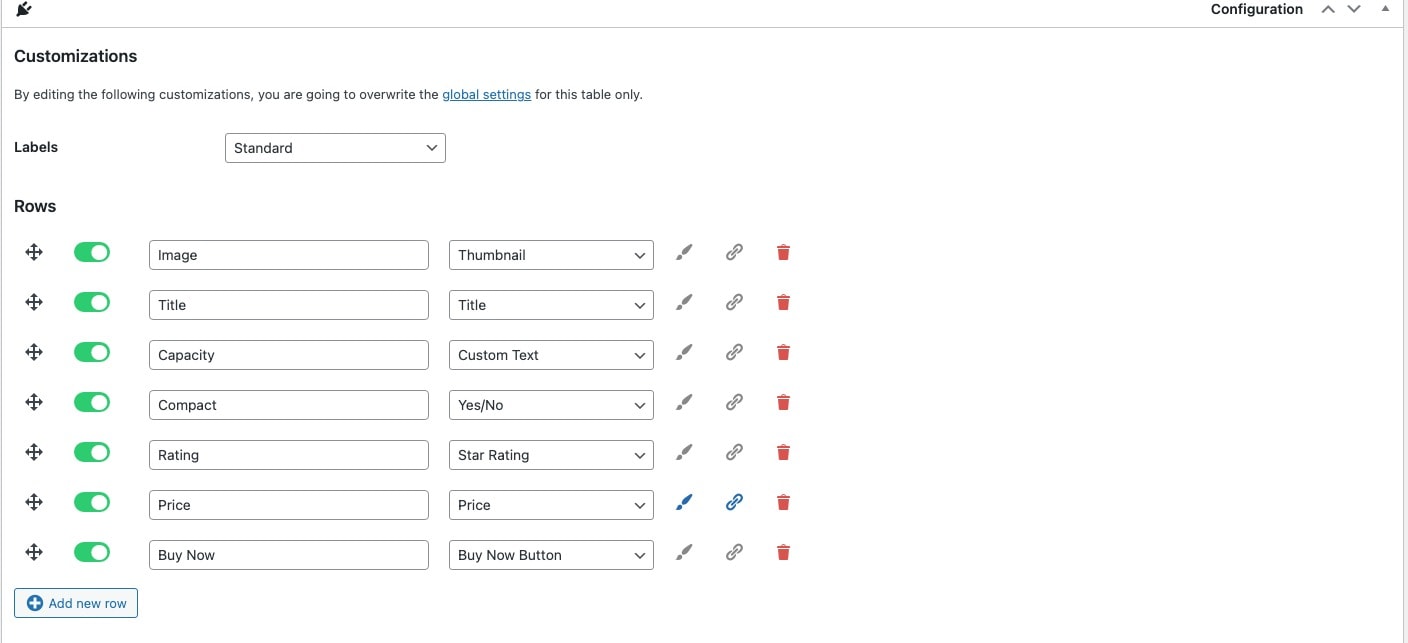
I have added the rows that the table should have. This can be done easily by selecting the type, for instance, the image, title, rating, price are dynamically pulled by the AAWP plugin and updated constantly to have the latest information. You can add Yes/No fields that can be checked on the product and custom text for each product. The table can be created easily in just minutes.
If you want to change the order for the row this can be done easily, by dragging on the plus sign on the left. You can also highlight the row by activating the brush sign on the right or create a link for that row to the affiliate product. These are some powerful features that can be done with just a couple of clicks.
In the label part, you can choose what to do with the labels on different devices, you can show them on mobiles or choose to hide them as you prefer.
After you have added the rows with the features to present for the products you have chosen next, you need to go and add the actual product that you want to appear in the table. In my case, I have chosen 3 products that I want to add to the comparison table.
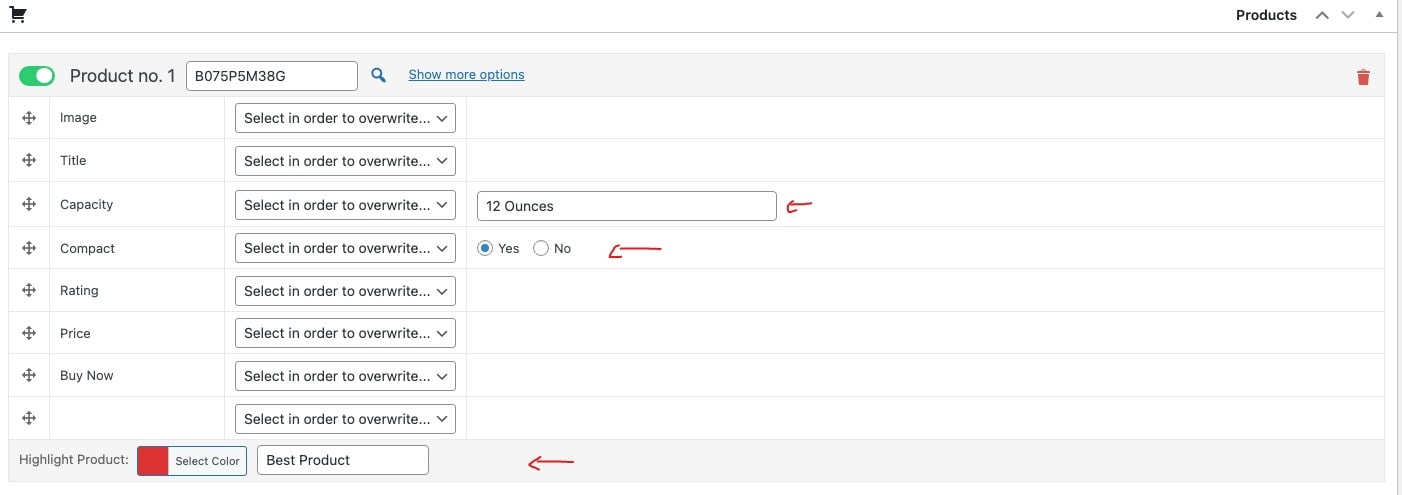
You can add a product either by ASIN or by searching it, my preferred way is to use the ASIN as I already have it, but if you just want to search it will look like below, after you search it just choose it and confirm the selection

After the product is added you will have the rows you have created in the 2.2 section. In here you can overwrite a row with what you want, for instance, if the title is not OK you can add your own title with the custom text. In this area, you will also add the individual text for that product in my case capacity and you choose the yes/no in function of what the product has.
In the lower part of the product, you have also a section called: Highlight Product, in here you can select a color and a text that will appear on the top of the product. This will highlight the product and will make it more appealing. Below is an example with the product and final result in the table
After you finish adding all the products you just hit publish on the right side and you will have the table ready with a shortcode that can be used to be inserted into any post. In my case the shortcode is [amazon table=”806″], this is visible on the table itself but also in the area with all the tables you have.
To add this into a post you just need to go and add a new shortcode block into the post and paste the table code as the below picture has:

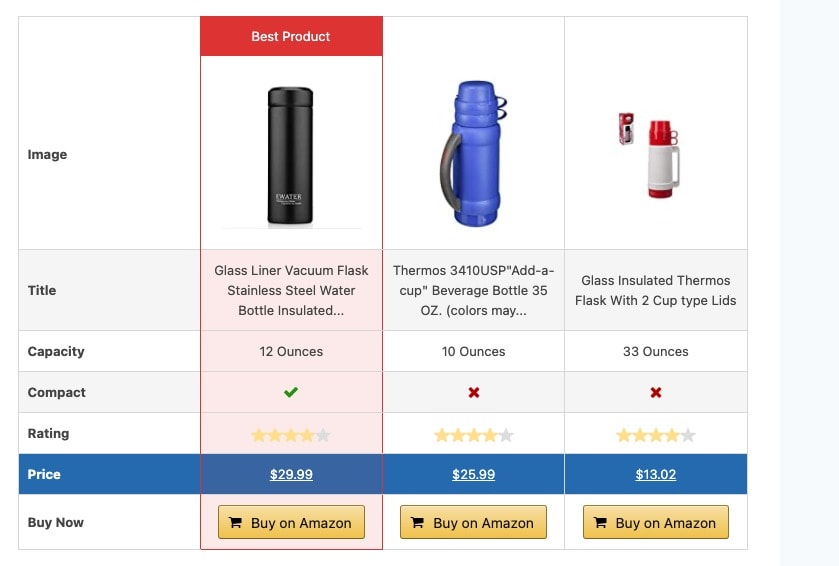
The 1 section is the block you need to choose and the 2 is the code that needs to be inserted. The final table that I have made will look like the below on the desktop:
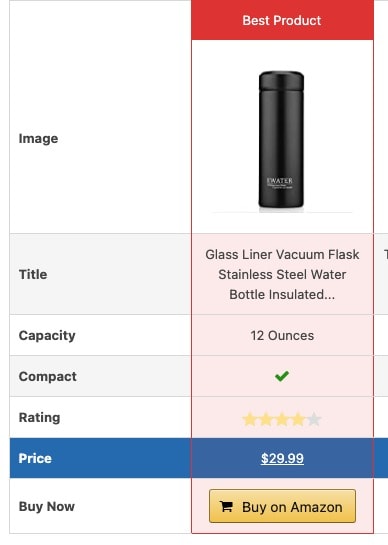
Mobile:

As you can see the plugin does a very good job to show a nice-looking table on desktop and mobile also.
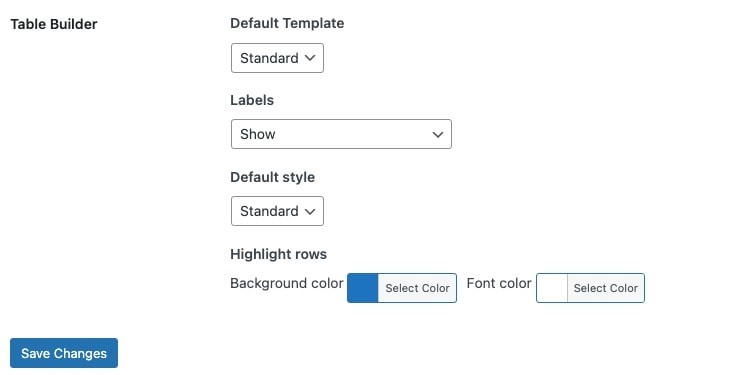
The plugin has also some global configurations that can be used to:
These are some of the global configurations that you can choose from AAWP – Settings – Functions – Table builder.
AAWP is a great plugin that can help you add a table easily and customize it as you like. The plugin is lightweight and doesn’t slow down your website. I am using it on my Amazon Affiliate websites and it helps me add a product comparison table easily in the roundup post with the best products.