
There are cases when WordPress will not send emails or the emails that are sent will reach the spam folder of the inbox accounts. This can be frustrating and you can even lose money if you have an online store, membership website, or course website.
When a new order is sent the customers expect an email to be sent with the details or if they are forgetting the password they would want to reset it, if emails are not working they can’t do that and you can even lose money.
Most hosting providers are relying on PHP default functions to send emails and use their shared IP addresses that are used by a lot of customers and most of the emails are not sent or it is reaching the spam folder.
This email not sending issue can be easily fixed in WordPress with the help of a plugin and a free email service like Mailersend that offers 12.000 free emails a month. You can check the Mailersend review to find out more about this service, but in short, this is an email service that can help us professionally fix the email issues. By using it you will be sure that your email reaches the destination and is not sent to the spam folder.
Let’s see the detailed steps that you need to follow to have this email issue fixed.
The first thing to do is to go and create a Mailersend account and add our domain to their account. This domain will be the one used to send emails. It can be used on multiple WordPress websites without problems if you have more.
After you register you will need to add your domain name and validate it for sending emails.First step will be to validate the email address that you have used to register. After You will have a screen like the one below:
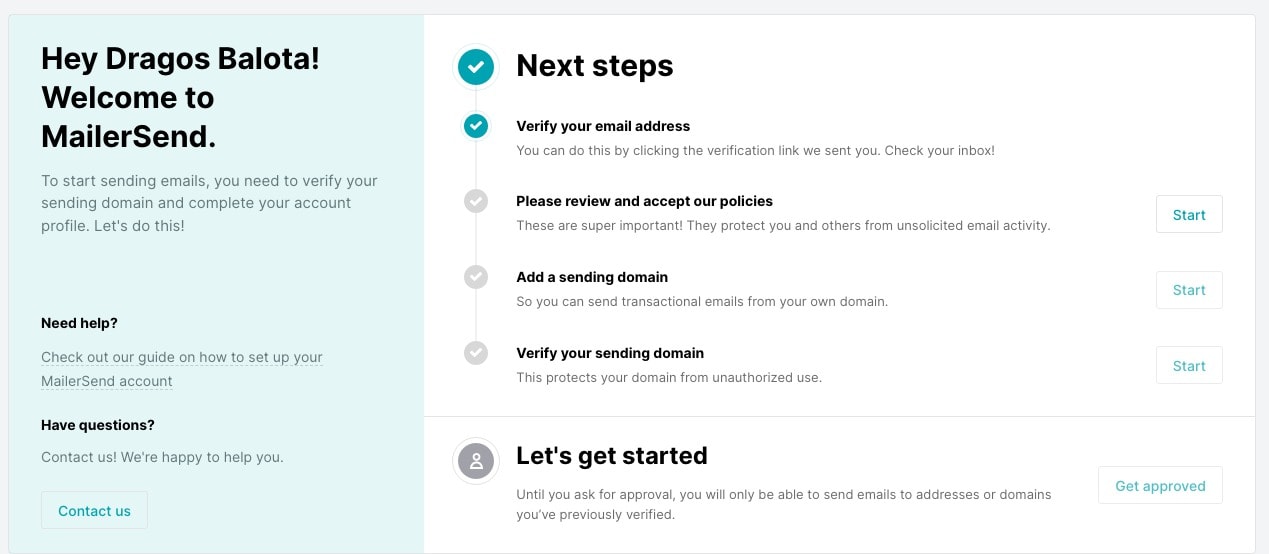
In here you will be asked to review and accept the policies and then add a sending domain. After that, you will need to add your domain that will be used to send emails. This will be the one that will appear in the FROM section of your email.
When you will hit add a sending domain Mailersend will prompt you to add the domain you want as below:

Next, you will move to Verify your sending domain where you will have the below details for activating the DNS records that are needed for emails to be sent, like SPF, DKIM, TXT and CNAME, which will be 1 in the picture below:
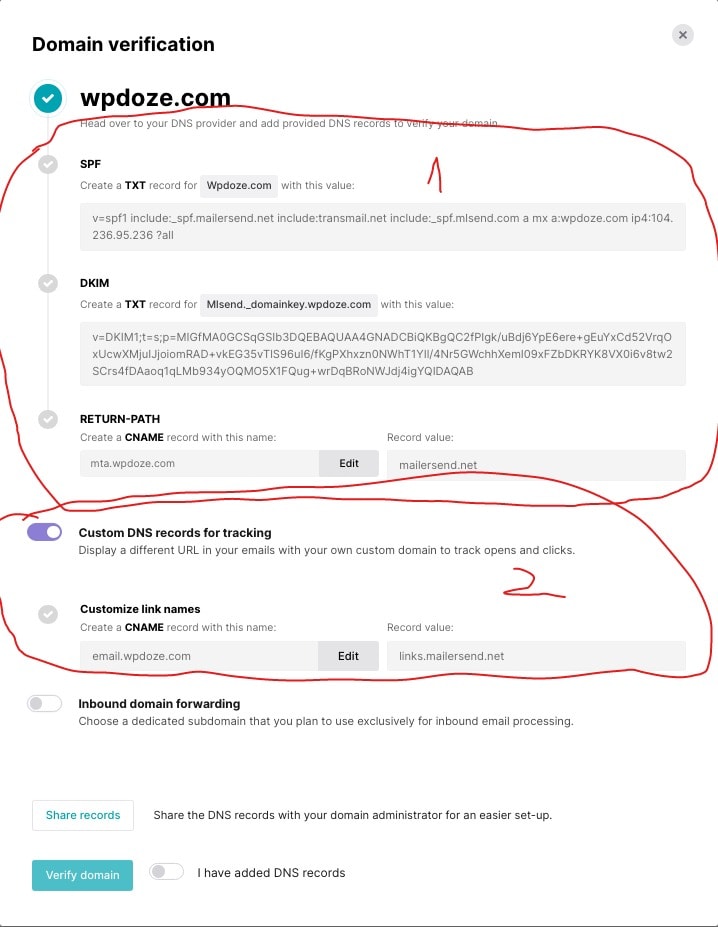
In the 2 sections if you want to track the clicks they will ask you to add a CNAME for that.
With these DNS records, you need to go to your DNS provider and configure them. I am using CloudFlare for this domain so we will go there and we will add them. For SPF modification it will be as below:
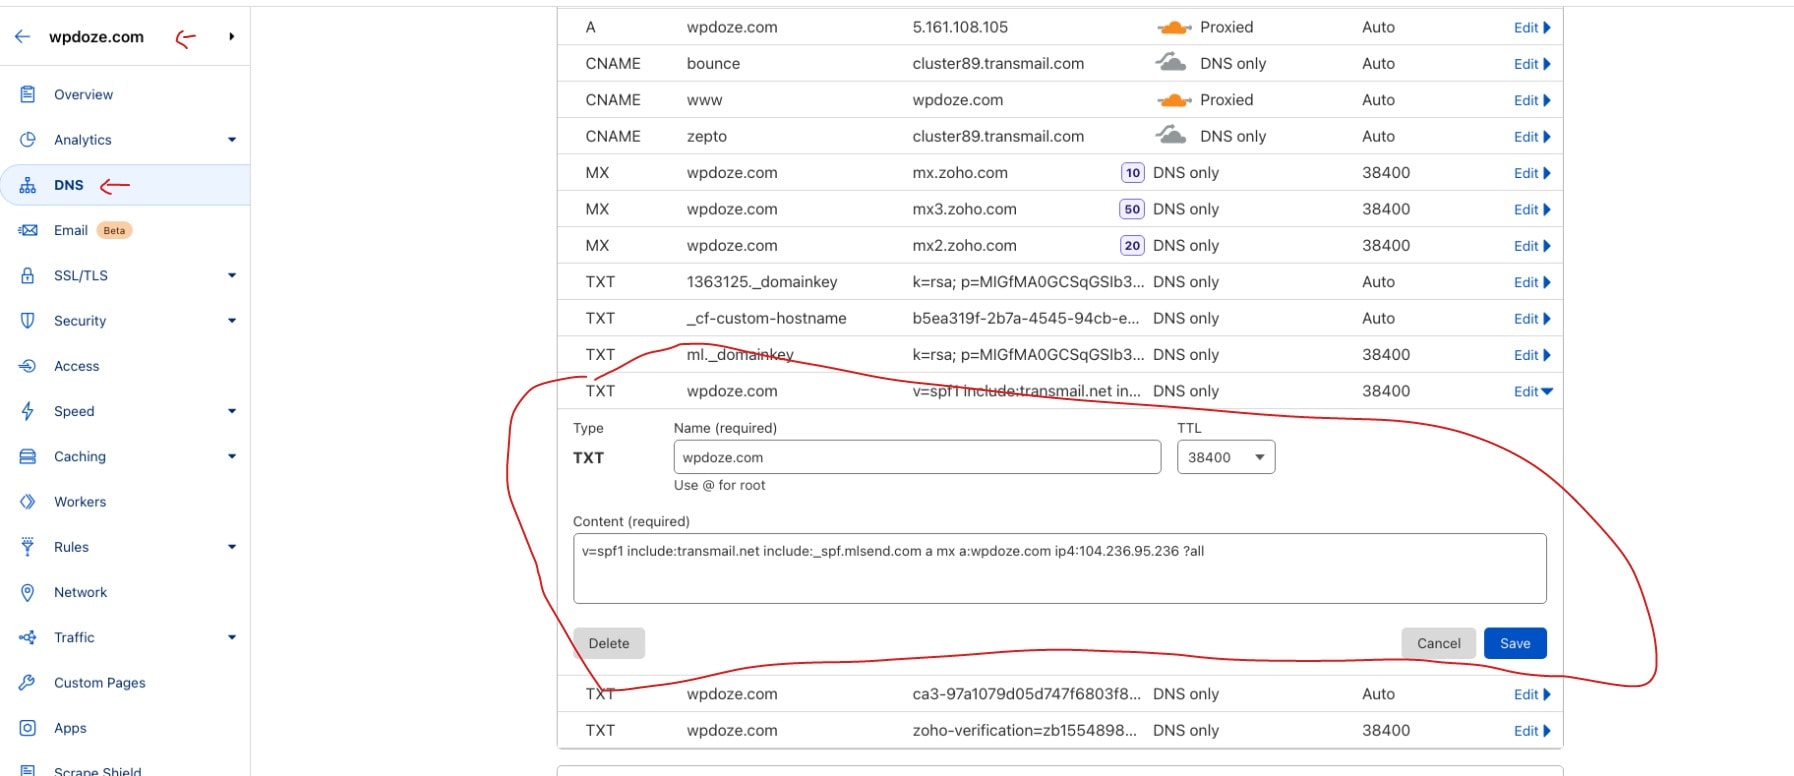
For the rest you will need to add the TXT record with the DKIM details, you just need to hit add and next, you will be asked for choosing the type where you choose TXT and then add the rest:

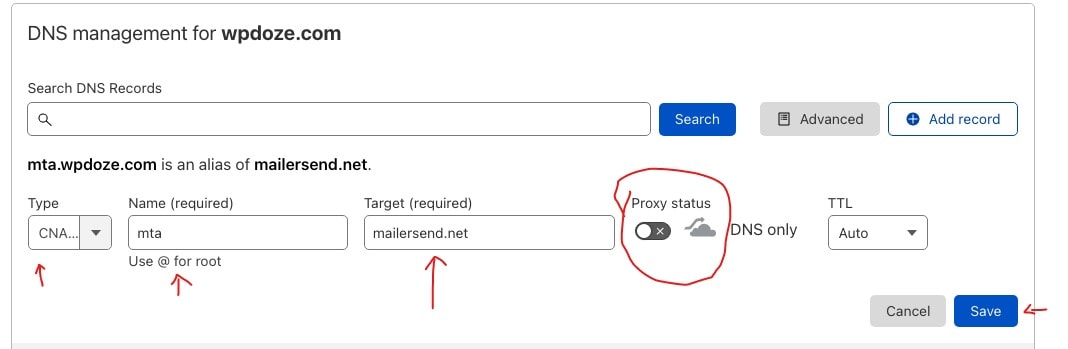
The CNAMES is the last step that you need to do, same as before you hit add record and choose cname and add them as below:
At the end when all are added you will need to hit Verify Domain. It will be verified in a couple of minutes, will read the DNS records, and will appear as done.
The last step will be to get approved, so you need to hit the last button Get Approved and Mailersend will review your domain. This happened fast for me in 20 minutes after you will be able to use the service.
With this configuration, you will only be able to send 100 emails a month to have access to the 12.000 emails you need to choose the free plan from the header Upgrade. You need to add the credit card for that, they will not charge anything but if you go over the 12.000 limits they will charge $1 for 1000 emails.
The last step that needs to be done is to configure WordPress to send emails thru Mailer send, this is an easy step that needs the Mailersend plugin to be installed and configure the SMTP user and password and FROM email.
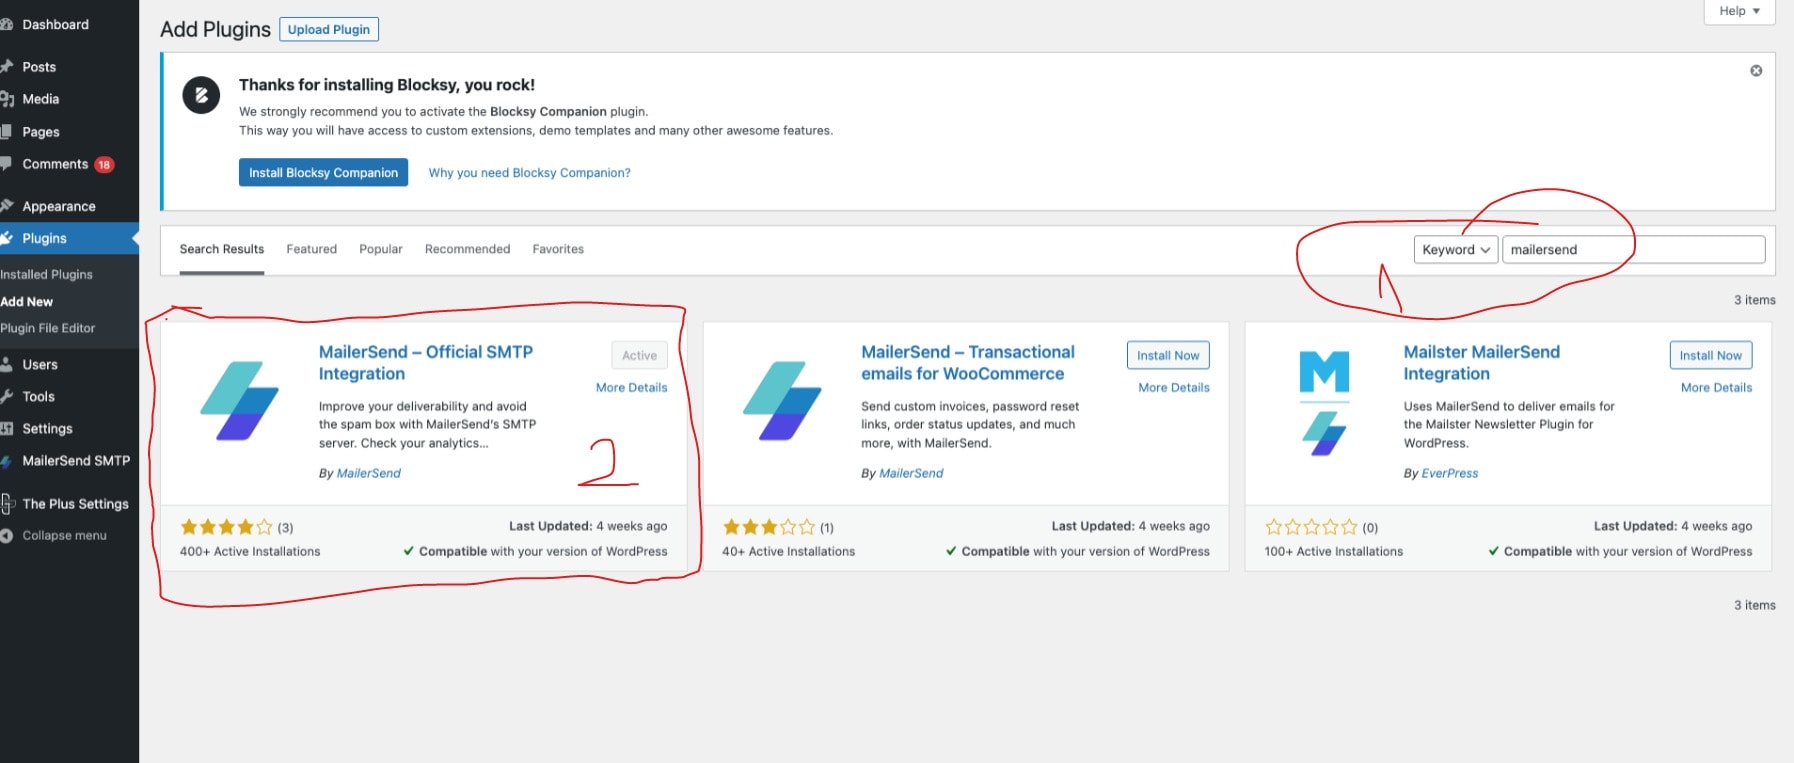
For this, you just need to go under Plugins – Add and search for Mailersend. From here you Install and activate the plugin:
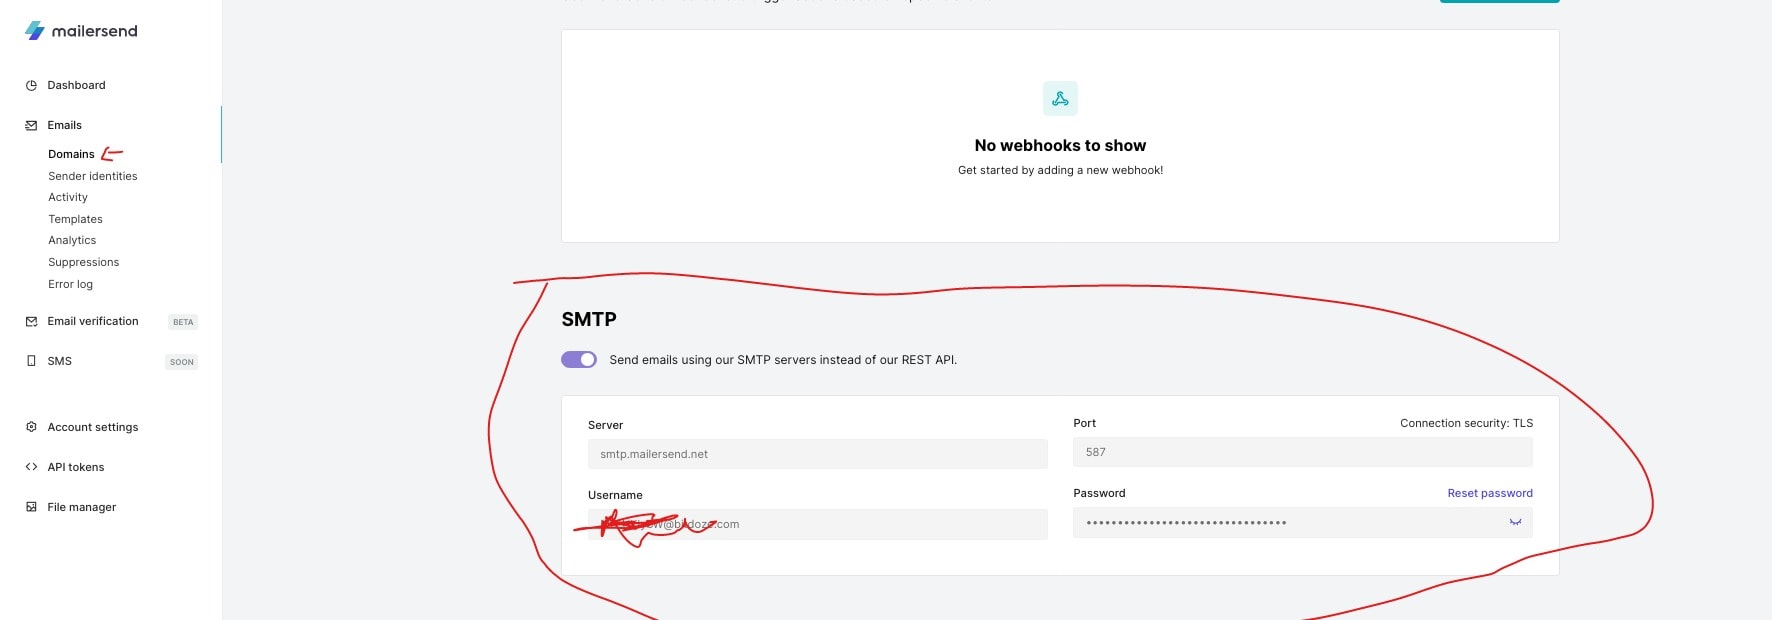
After the plugin is installed we will need to get the SMTP user and password as we will need to use them in the plugin settings to link Mailersend to WordPress. For that you need to go under Emails – Domains, click on the domain you have entered, and below you will find the SMTP details. If not active just activate them:
With the active SMTP and username with Password, we will go under WordPress admin in Mailersend and we will configure the below:
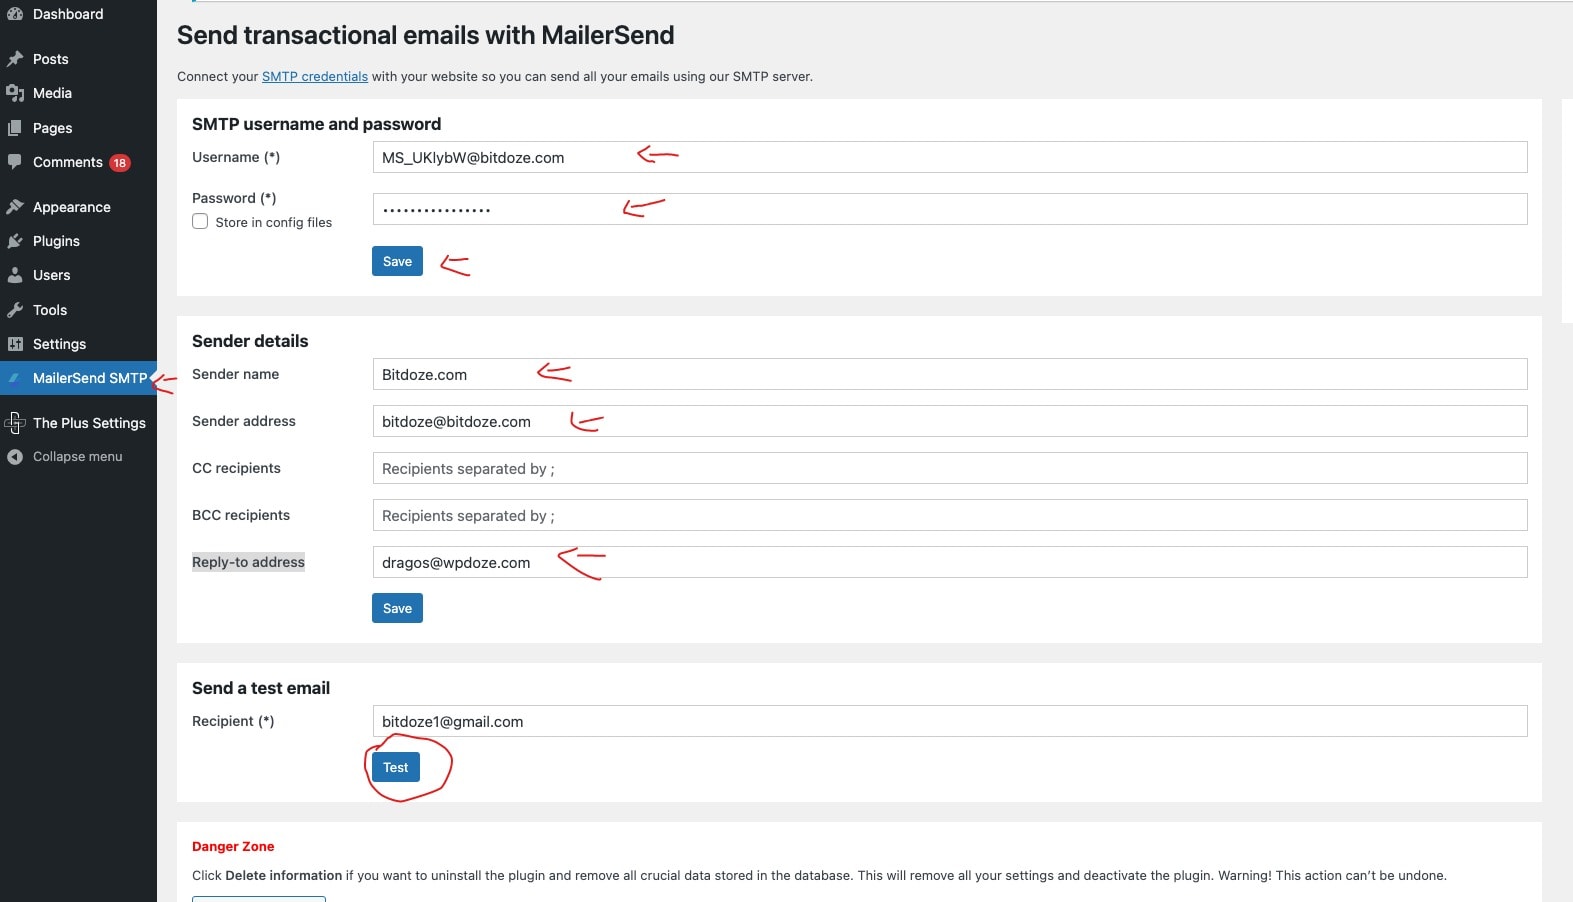
In the end, you send a test email to see that everything is working as expected. That’s all, now all the emails that will be sent from WordPress like comment notifications, contact forms, or password reset will use Mailersend for that.
12.000 free emails a month are more than enough for any website so you don’t have any reason not to use a dedicated email service, the configurations are easy to do and the interface of Mailersend is offering the reports you need.