
If you want to host your own video and add it to WordPress then you can check Bunny.net Stream Service. This is relatively a new service that allows you to host your videos on their CDN network. Bunny.net will handle transcoding, storage, security & a video player for you.
Basically, it handles everything for you at lower costs. This service is perfect for someone that is selling courses on their website or has a membership website and wants to control access to the video.
With Bunny.net Stream Service you can do similar things on YouTube but the host and secure the video in their network (bunny.net one).
They are charging you only for 2 things: storage and CDN traffic, the price starts from $0.06/GB for storage (3 zones) and $0.005/GB for CDN. The price is really cheap for what you find out there so for 10 GB storage and 100 GB CDN traffic you will pay 1.1$.
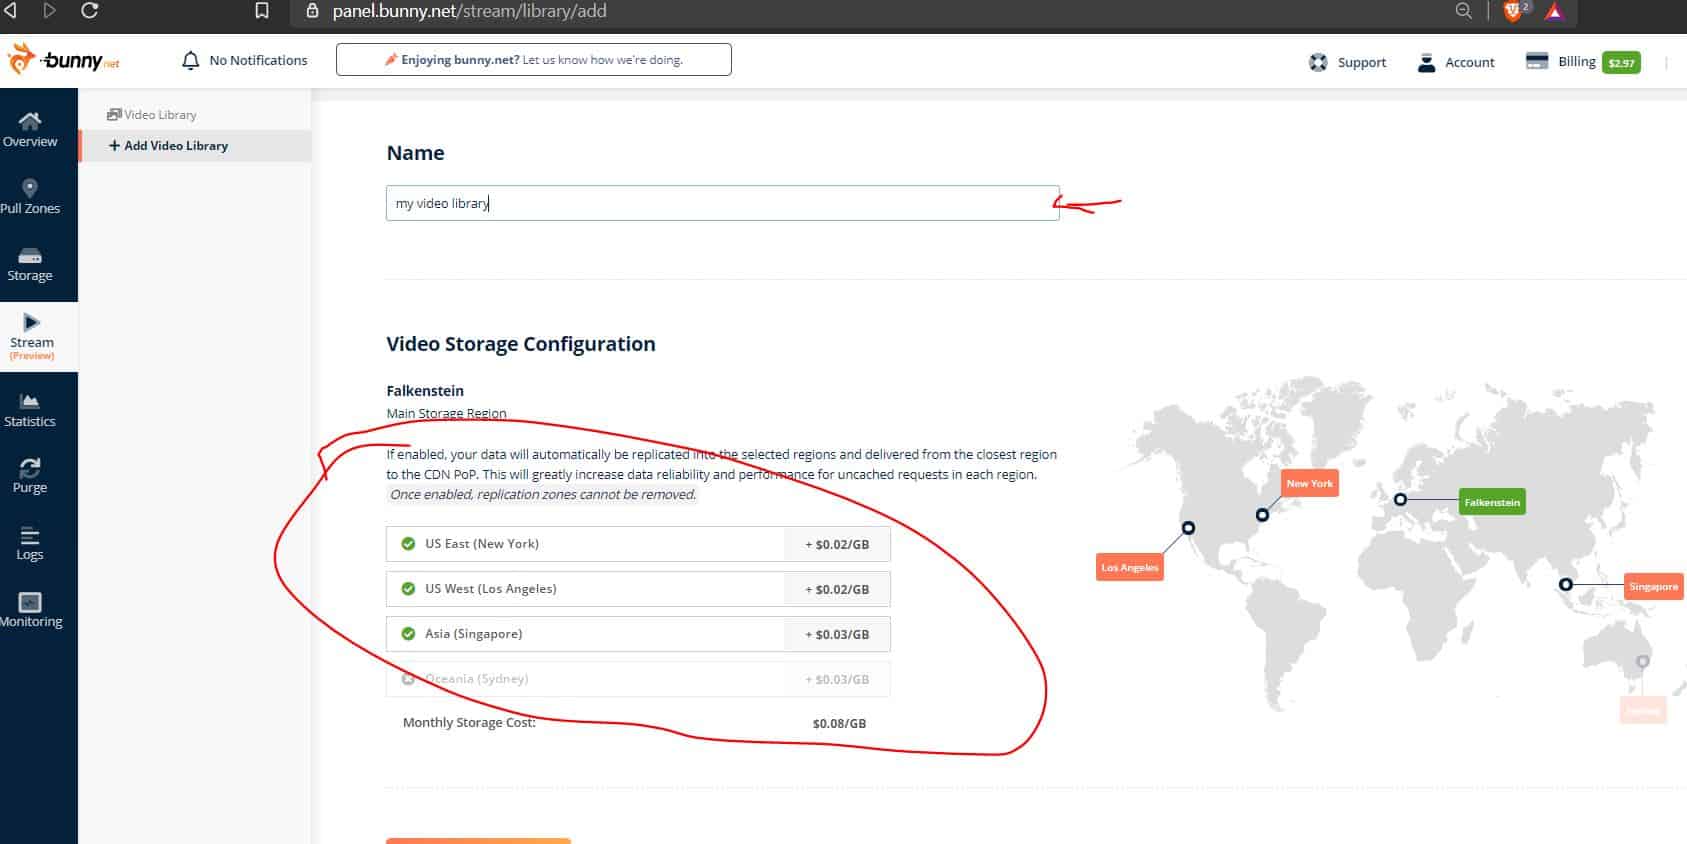
You just go to Stream and hit Add Video Library

Choose the location where the videos will be replicated, by default is EU Frankfurt for me, and I can replicate the videos in the US (2 data centers) Singapore, and Sydney.
You need to create a collection next where the videos will go. Is like a category, after you hit upload video just as for YouTube.
After your video is uploaded you are sent to a video options screen where you can change the Title, add a thumbnail, and get the embed code.
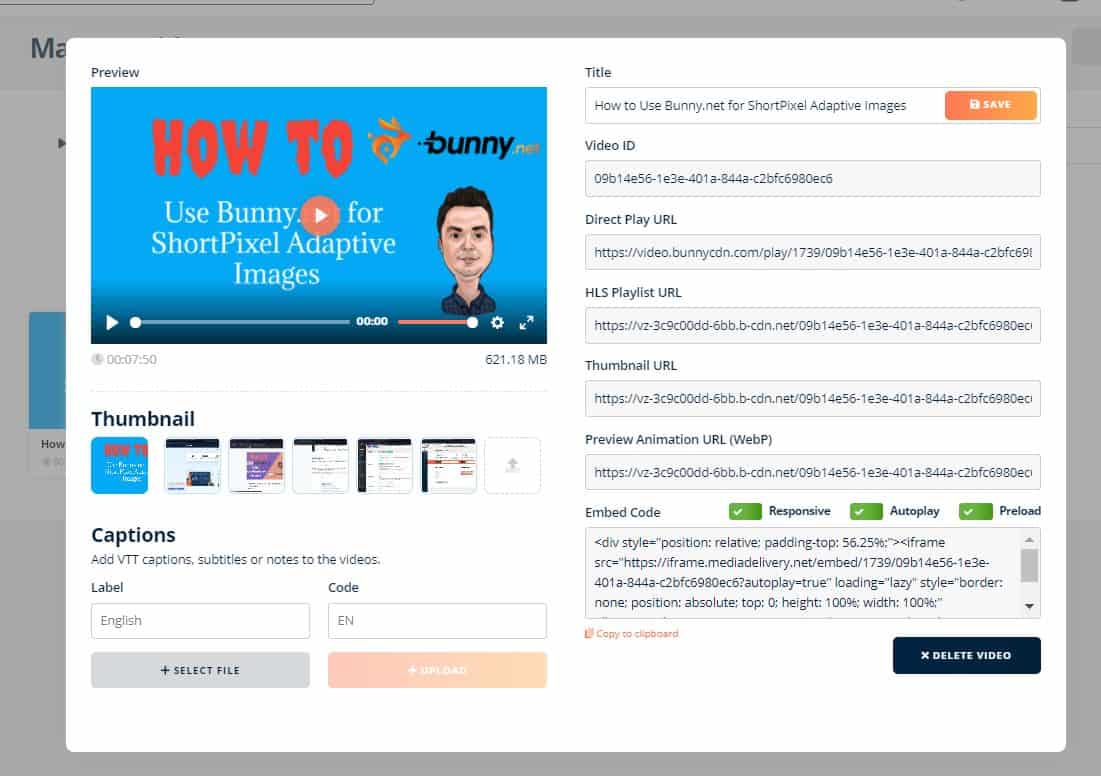
With the embed code go to blocks and choose HTML block and just add the code there. After the video will appear on your website. Below is an example with a video that I have loaded for tests
I have created a video that is explaining everything. Also, I am going into more details about the security features and other features that bunny.net streaming service has. Check the video for all the details.