
If you want to monitor your website’s uptime and load speed on your own VPS you can do so with a free tool called Uptime Kuma. This tool allows adding different alerts like emails, slack, discord telegram, etc when your website is down. It is also keeping a history with the website load time.
If you have a VPS with docker you can plug it there with a reverse proxy and keep it along with other tools like Plausible. I want to use my own tools and that’s why I prefer open-source alternatives that can help me.
If you are interested to see how Hetzner is comparing with DigitalOcean you should see: DigitalOcean VS Hetzner: Which is The Best VPS Provider
If you are interested to see how the best VPS providers compare check the DigitalOcean vs Vultr vs Hetzner article.
In this article, we will see how we can set up Uptime Karma on a Digitalocean droplet and have our websites monitored. We will use docker and Nginx as a reverse proxy to add the SSL certificate and access the website.
To self-host Uptime Kuma you need a VPS server where you can install the app. You can use digitalocean, Vultr or Hetzner.
Uptime Kuma is lightweight and will not use a lot of resources you can host it on a 1 CPU 1 GB of memory VPS without problems.
In the video, you will see how I am installing an Ubuntu 21.10 on Digitalocean, is not hard you just need to go and choose a droplet.For a more affordable option to DigitalOcean, you can check this Hetzner Review.
Add swap if VPS is not having any. Usually, VPS servers on the digital ocean don’t have a swap so you need to add some in case there will not be enough memory on the server swap to be used.
You can follow: How to Add Swap Space on Ubuntu 20.04 | Linuxize
Next, we will move to the exact steps with the commands we need to run and have Uptime Karma set up on our web server. For detailed instructions, you can watch my video.
Install needed software, like git, Nginx, we will also upgrade everything and restart the server:
sudo apt update
sudo apt upgrade
sudo reboot
sudo apt install nginx git
Docker install:
Next, we need to install docker and docker-compose. Uptime Karma will create some containers from where it will run. You can follow my steps and in case of issues follow docker official documentation.
Official doc: docs.docker.com/engine/install/ubuntu and Install Docker Compose | Docker Documentation
To install Docker, we first need to add its official GPG key, and set up the stable repository:
curl -fsSL https://download.docker.com/linux/ubuntu/gpg | sudo gpg --dearmor -o /usr/share/keyrings/docker-archive-keyring.gpg
echo "deb [arch=amd64 signed-by=/usr/share/keyrings/docker-archive-keyring.gpg] https://download.docker.com/linux/ubuntu focal stable" | sudo tee /etc/apt/sources.list.d/docker.list > /dev/null
sudo apt update
sudo apt-get install docker-ce docker-ce-cli docker-compose containerd.io
Create a directory where to store your docker volume:
 mkdir /docker-vol
 mkdir /docker-vol/uptime-kuma
 mkdir /opt/uptime-kuma
Navigate to the uptime-karma directory and create a docker-compose file:
cd /opt/uptime-kumaBellow, we will create a docker-composer.yml file with below details that will use port 8001 for outside and restart: unless-stopped to automatically start at server shutdown or crash, we will add our volume to the dir created /docker-vol/uptime-kuma
---
# Simple docker-compose.yml
# You can change your port or volume location

version: '3.3'

services:
  uptime-kuma:
    image: louislam/uptime-kuma
    container_name: uptime-kuma
    volumes:
      - /docker-vol/uptime-kuma:/app/data
    ports:
      - 8001:3001
    restart: unless-stopped
    security_opt:
      - no-new-privileges:true
Run Docker compose to create the container:
docker-compose up -dAllow public traffic to ports 80 and 443 (HTTP and HTTPS) using the “Nginx Full” UFW application profile:
sudo ufw allow "Nginx Full"Add the uptime_kuma config into Nginx proxy by replacing the your_domain_here with your domain into /etc/nginx/sites-available/uptime-kuma.conf
sudo vi /etc/nginx/sites-available/uptime-kuma.confIn here we set up Nginx to listen on port 80 and forward the request that is coming to your_domain_here to localhost and port 8001 where Nginx is installed.
server  {
    listen 80;
    server_name    your_domain_here;
    location / {
        proxy_pass         http://localhost:8001;
        proxy_http_version 1.1;
        proxy_set_header   Upgrade $http_upgrade;
        proxy_set_header   Connection "upgrade";
        proxy_set_header   Host $host;
    }
}
Create a symbolic link into sites-enabled and activate the site, we also check that the config is OK and we reload Nginx so the settings to be applied.
sudo ln -s /etc/nginx/sites-available/uptime-kuma.conf /etc/nginx/sites-enabled/
# Check the config file
sudo nginx -t
#reload nginx so configs to be in place
sudo systemctl reload nginx
You just need to go into the hosting provider and just put the A record as this server IP. This can vary in function of the provider where you are hosting your domain. You just need to go to DNS settings and add an A record to your VPS server IP.
We want to use the HTTPS on the website we have used for Uptime Kuma, Let’s Encrypt will help us with our certificate. To have a certificate you need to follow the below steps:
Install certbot
CertBot package will help us generate a certificate for our domain and also automatically make Nginx use the certificate and port 443.
sudo apt install certbot python3-certbot-nginxGet a certificate for your domain to subdomain:
This command will generate a Let’s Encrypt certificate and will alter the Nginx configuration in the file uptime-kuma.conf
After we should have a fully HTTPS website.
The command will do everything for you and activate the certificate and configs on your domain:
sudo certbot --nginx -d your_domain_hereThe first time you log in to Uptime Kuma you will be prompted to add a username and password. After you insert that you can add your first site to monitor.
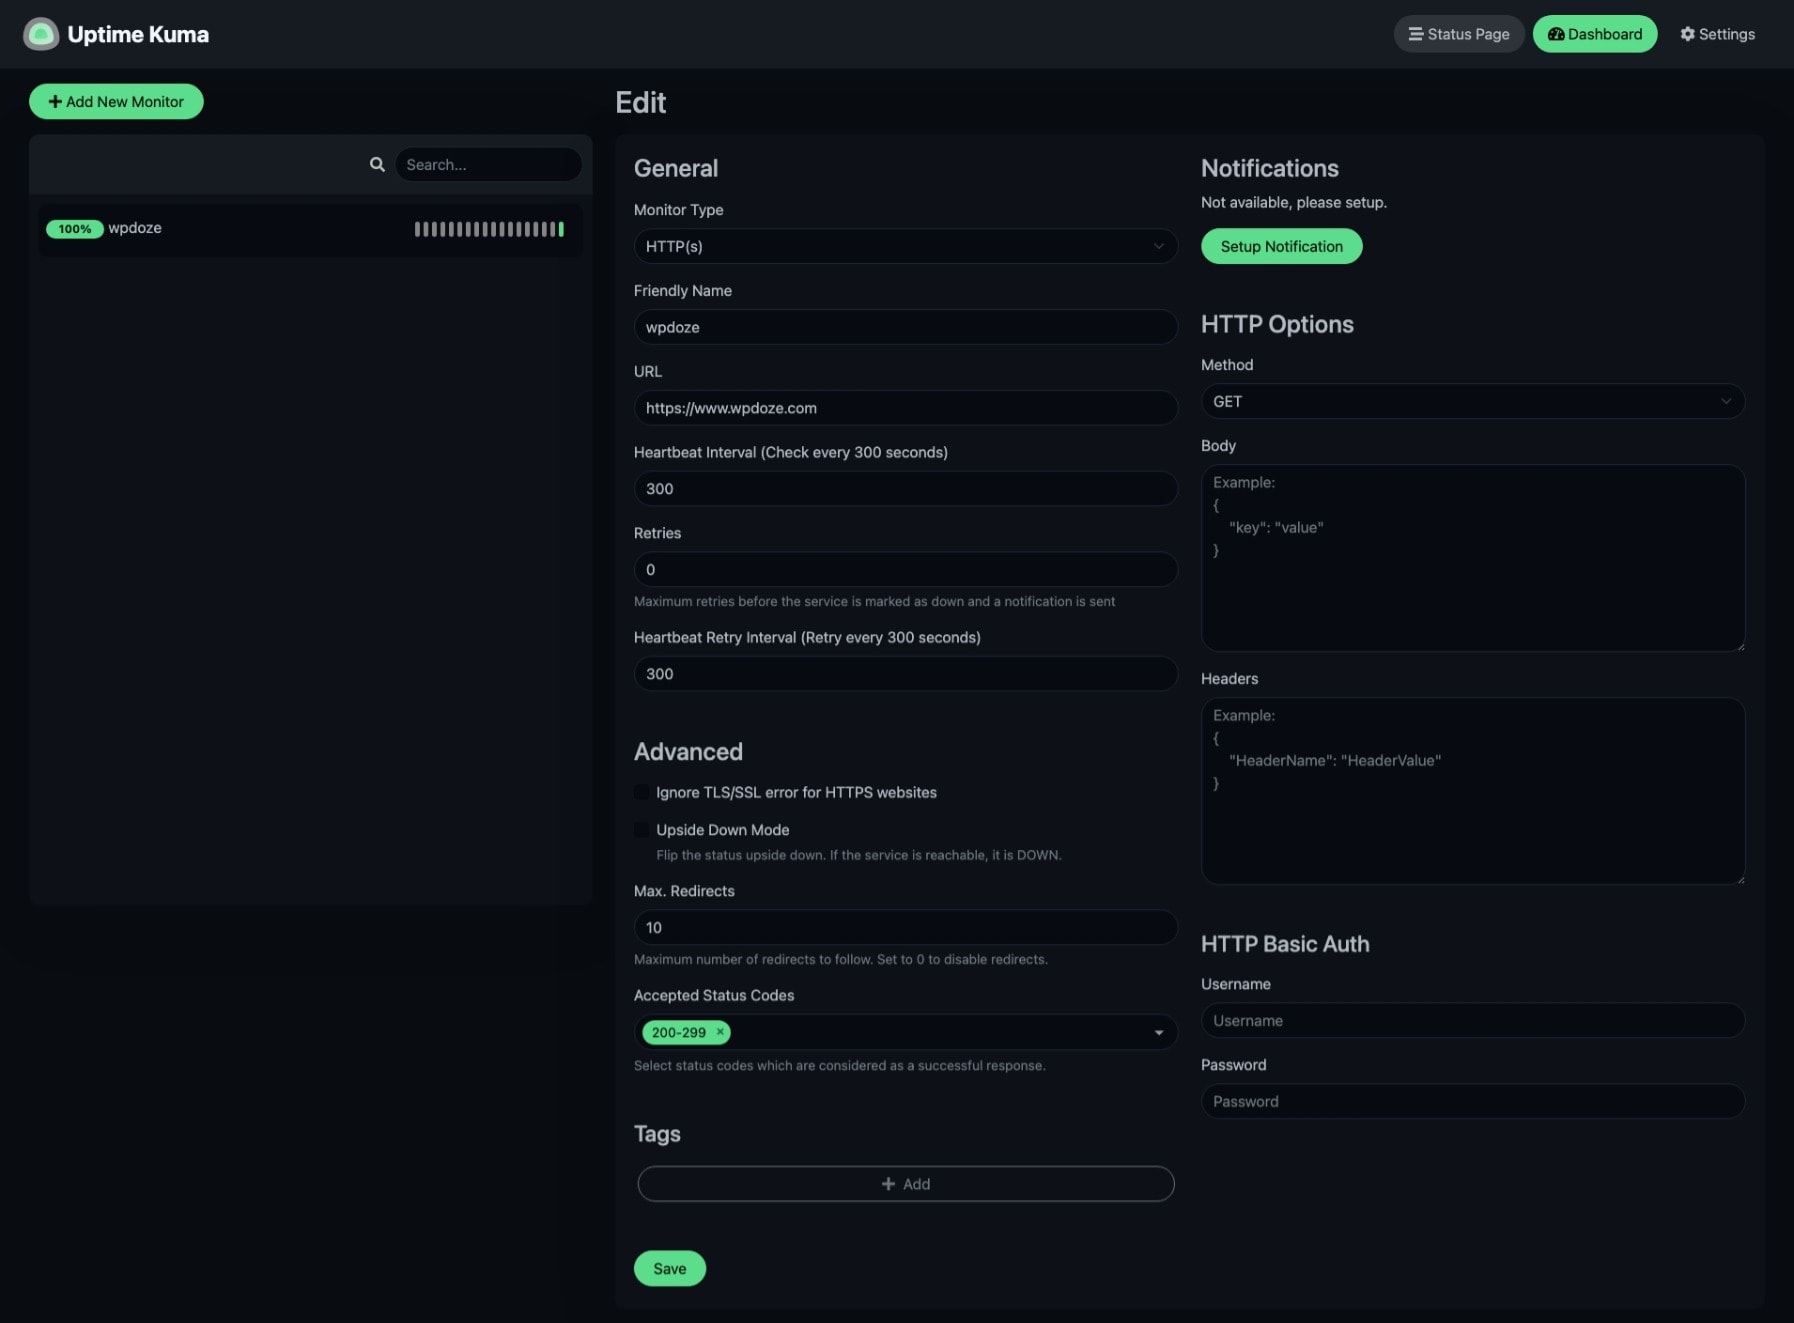
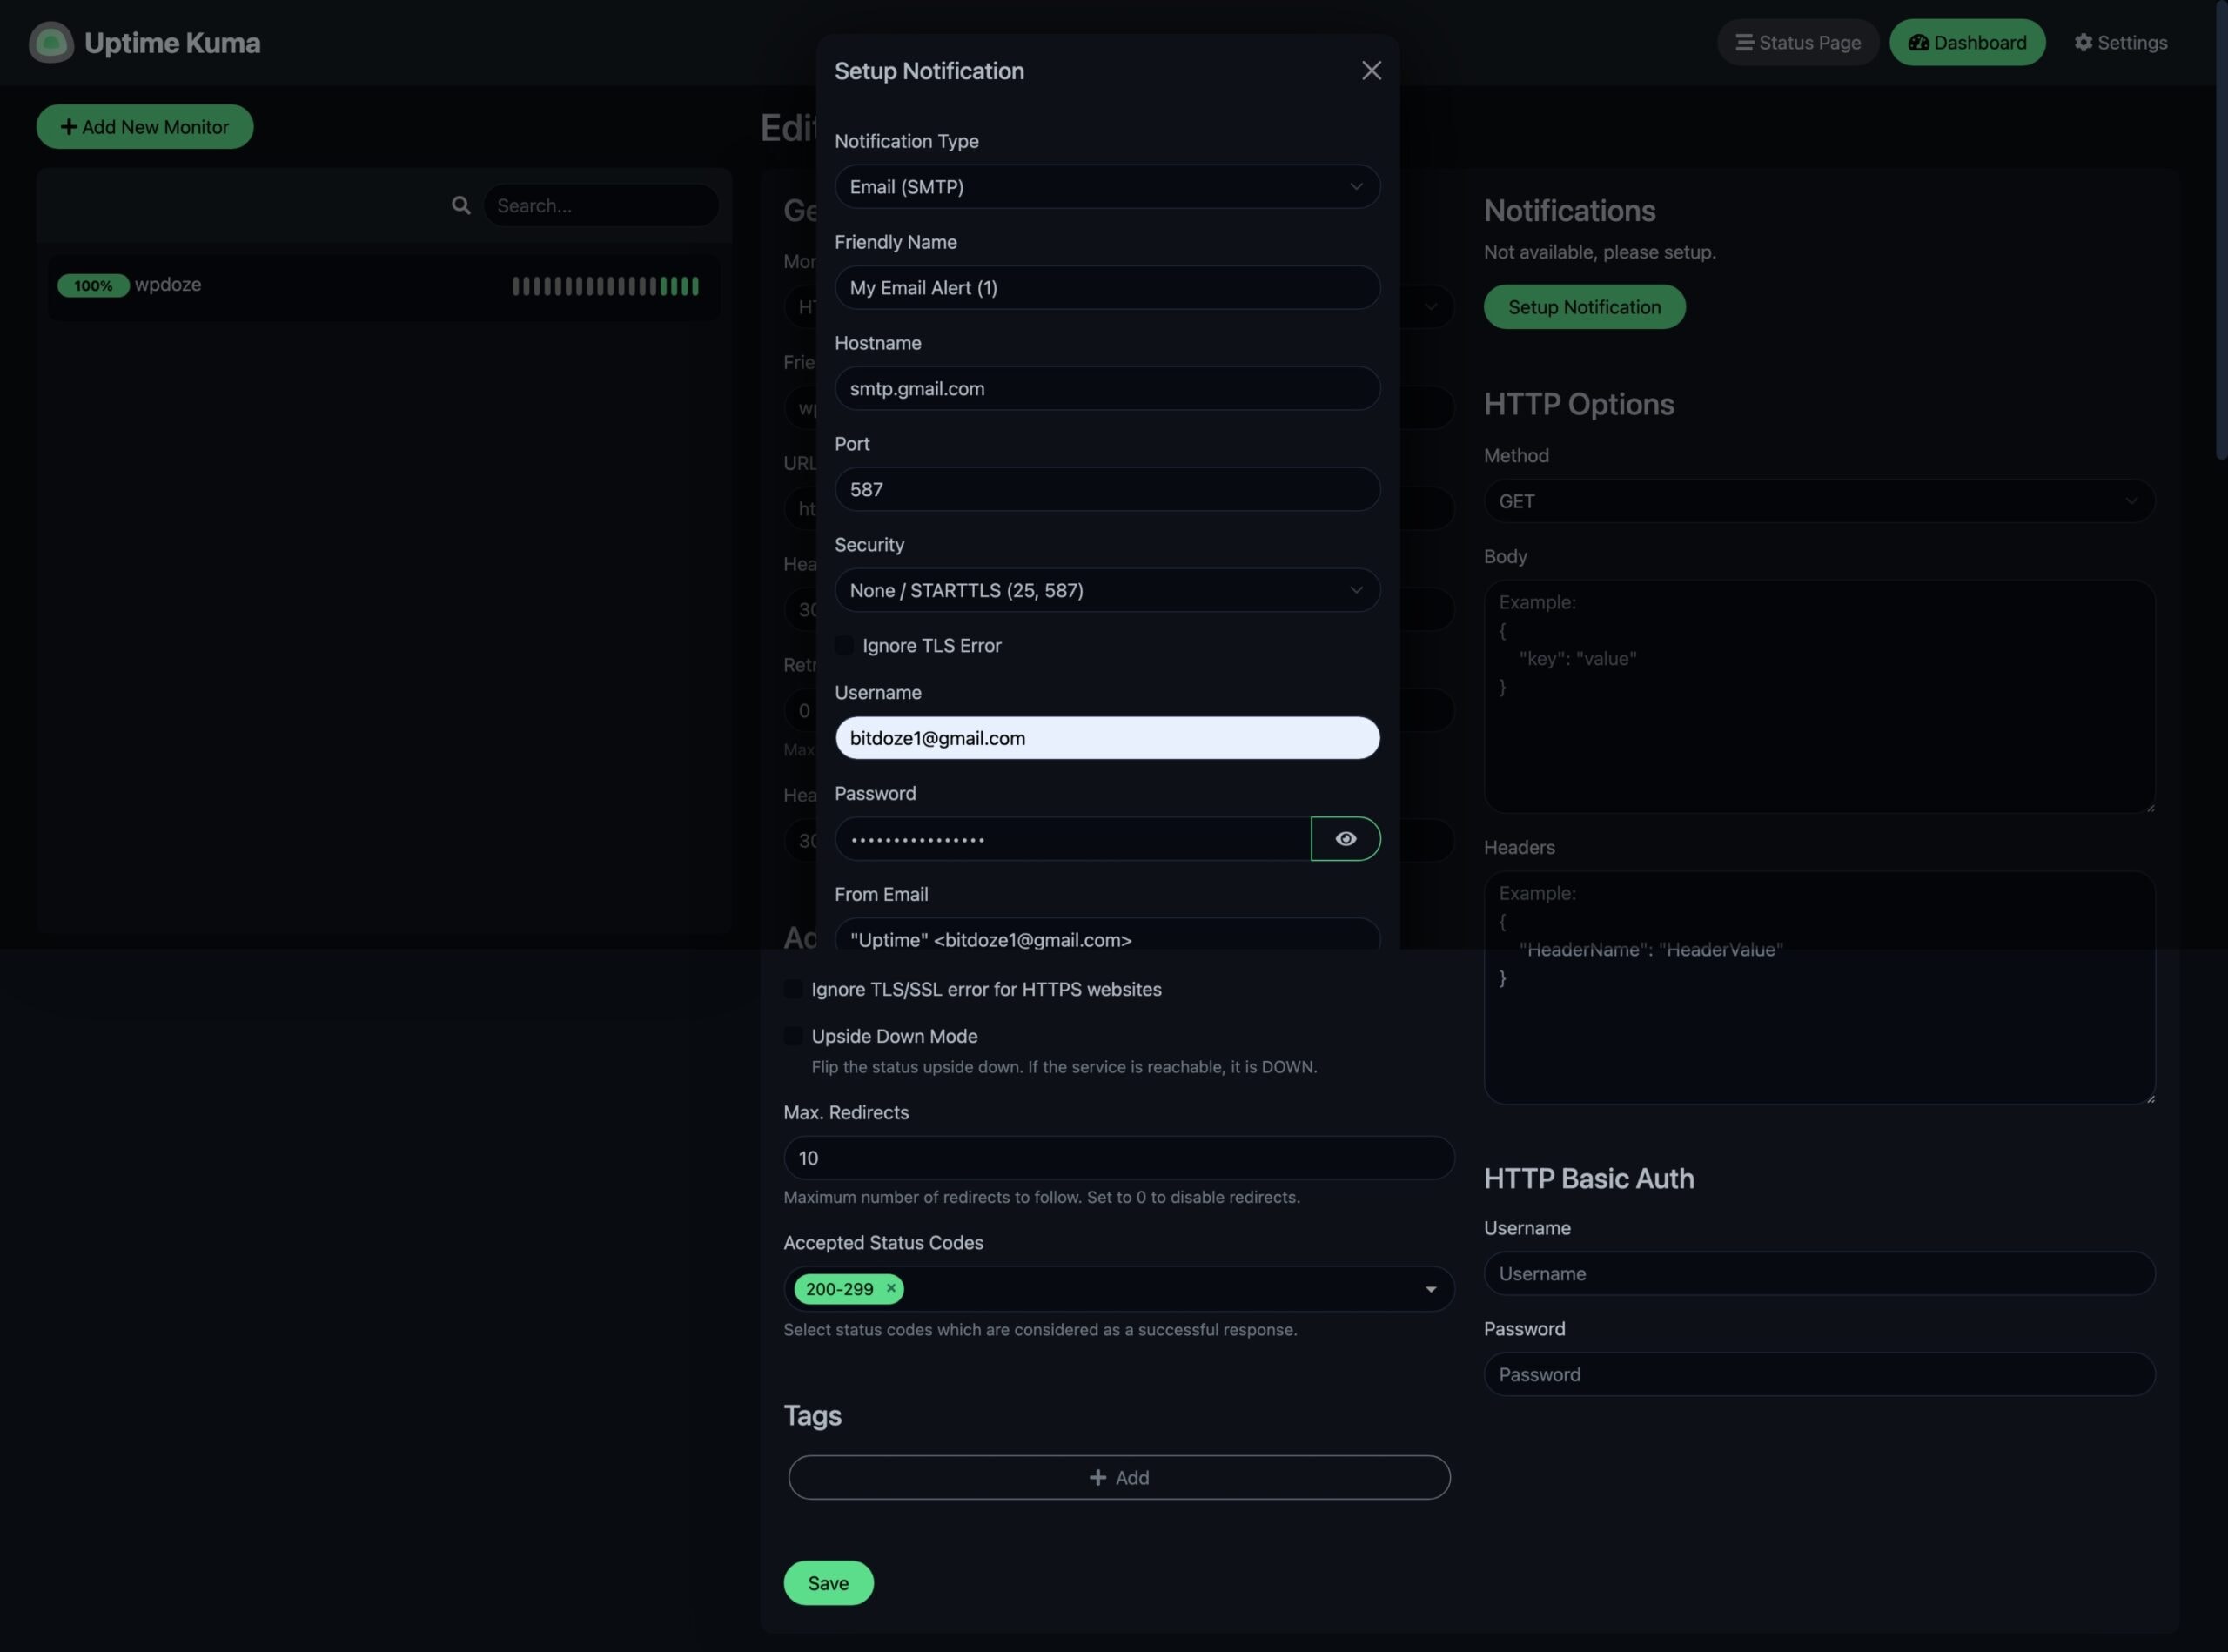
Then you can set up your notifications, you can choose from email to slack or discord, etc:
For SMTP to use it with Google SMTP set bellow and run Test at the end and Save:
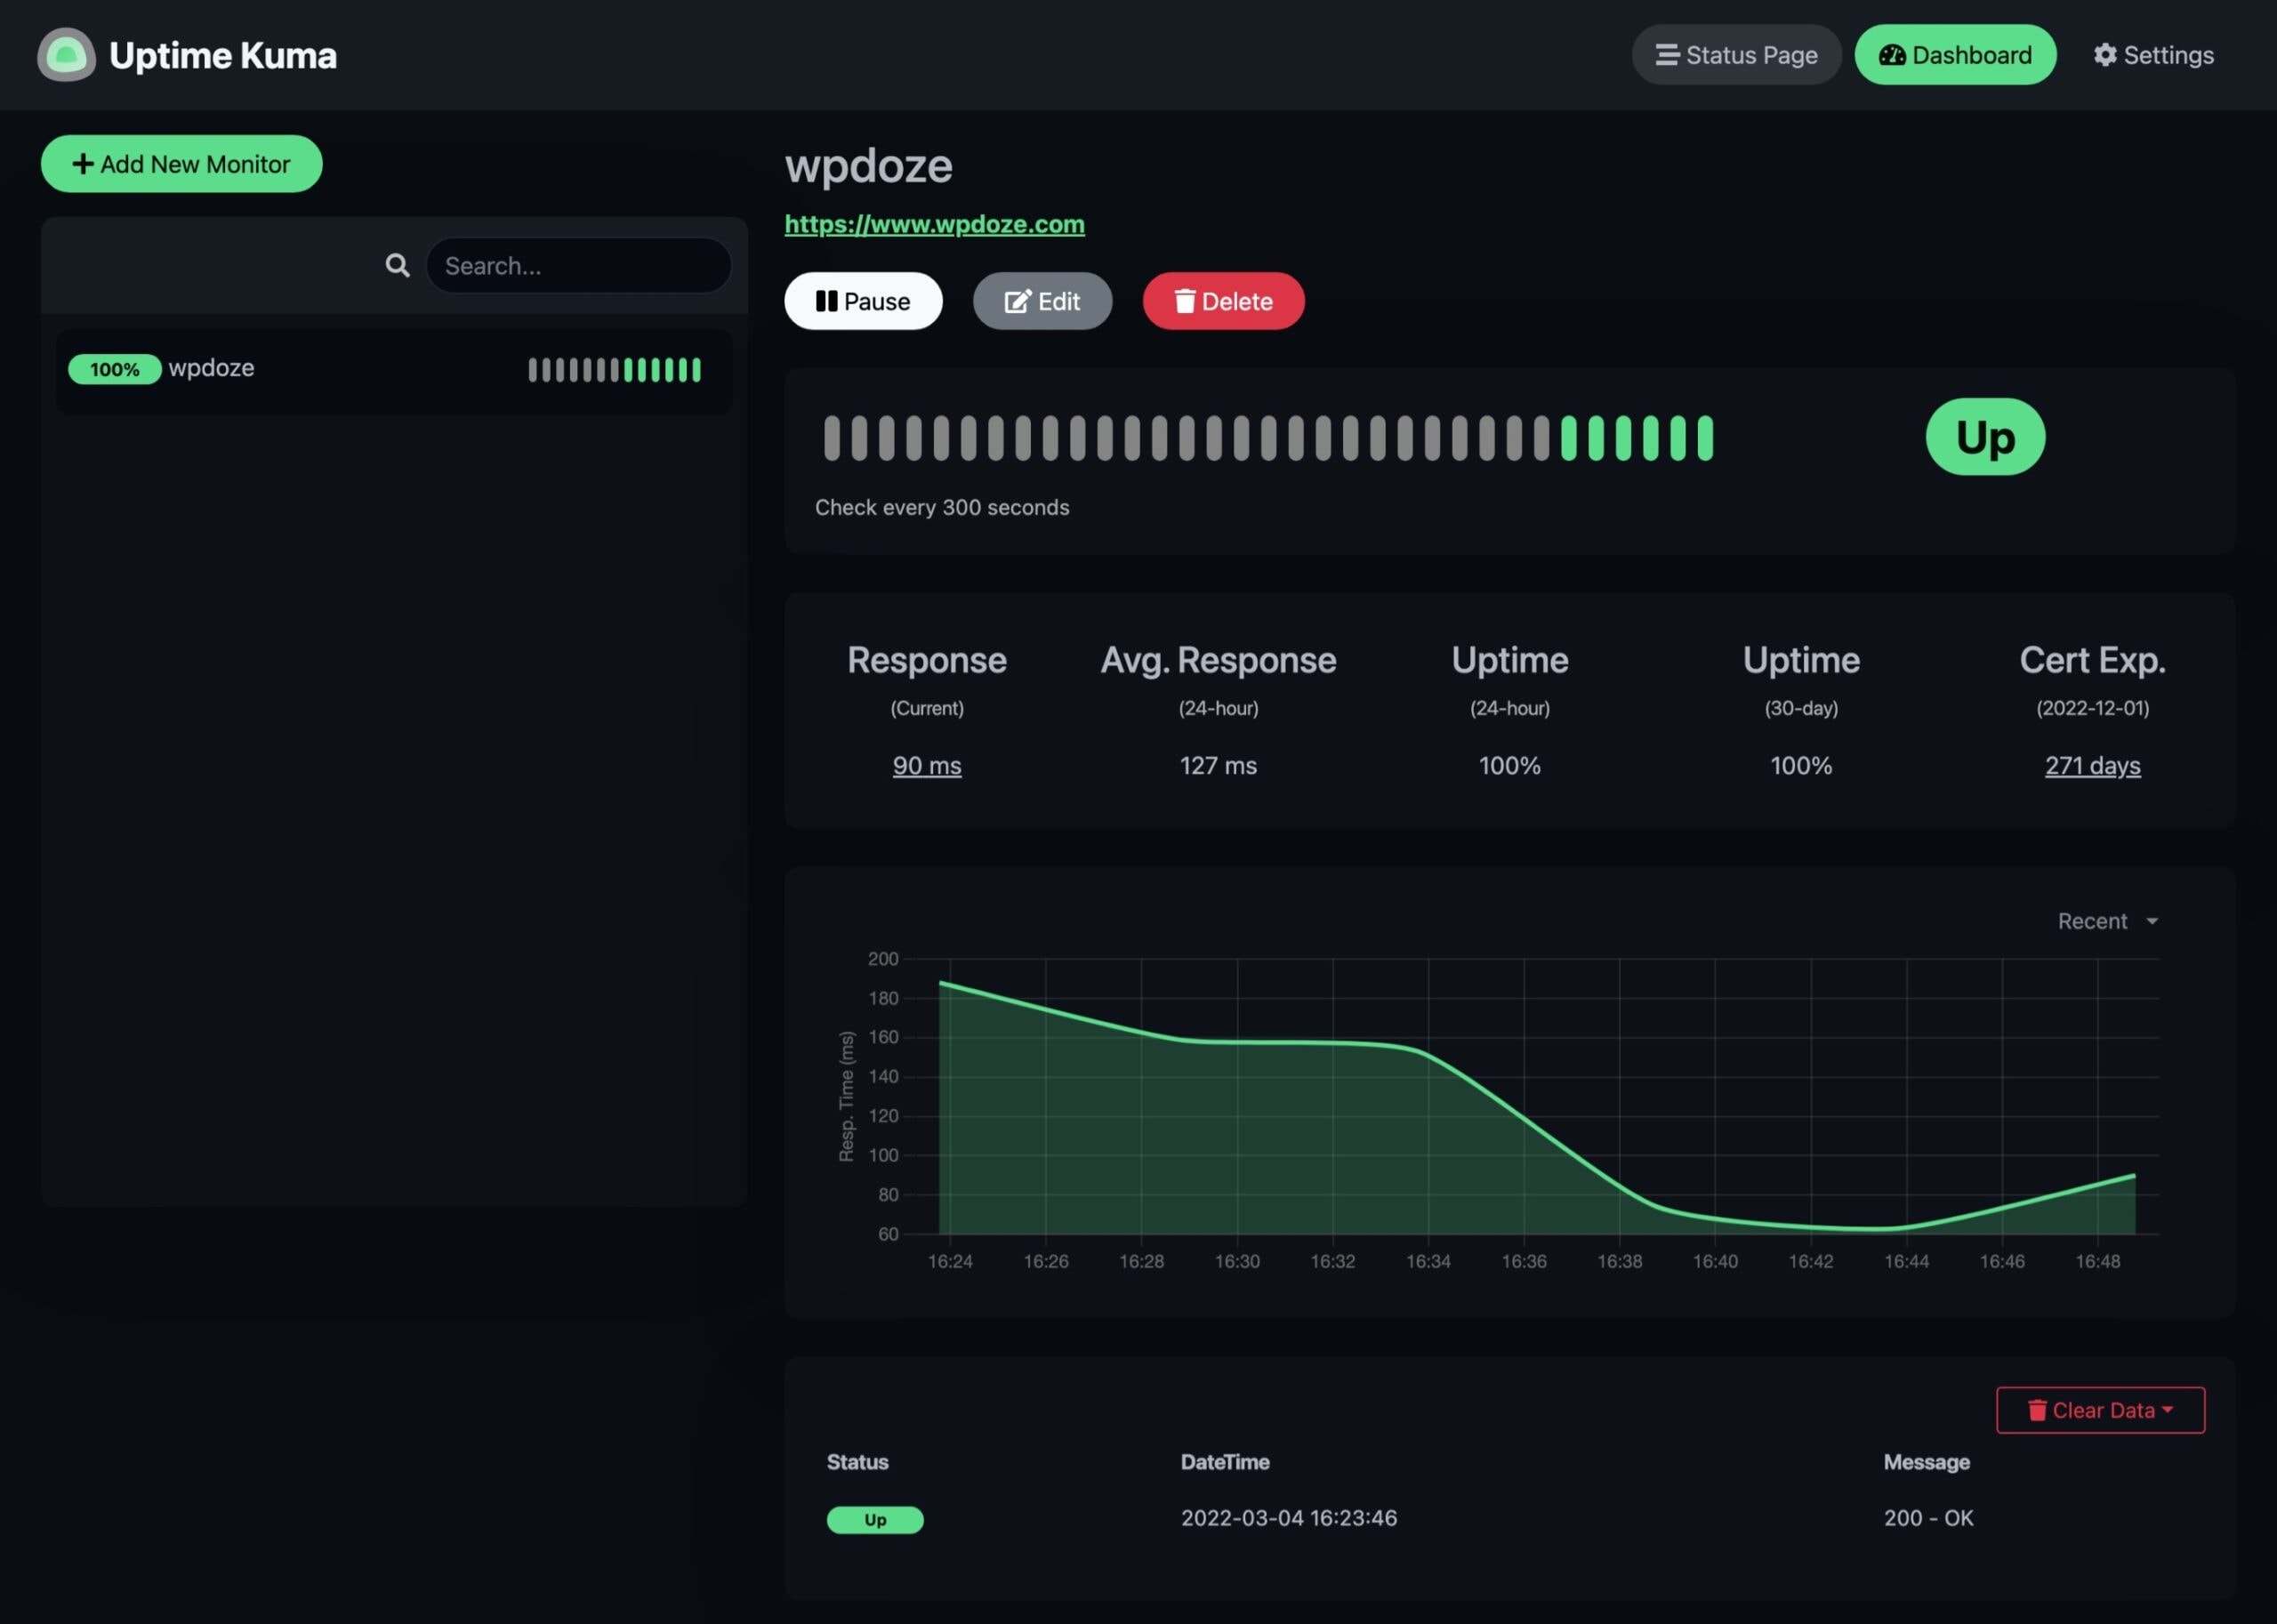
If everything is good the bellow will be seen in the dashboard:
If something goes wrong you will be notified with bellow emails. When service is recovered you will be also notified:

That’s the way can use and have a free web monitoring tool installed on a VPS and relay on other tools. On the same VPS with Docker and Nginx you can have multiple services installed and running. Uptime Kuma can help you monitor a lot of this like SSL, response time, DNS, TCP port,etc.
DauryDiCaprio says:
Hey dude, you have a little bug in the docker file.
The name of the docker file (docker-composer.yml) should be docker-compose.yml
Thanks for your content.