
If your use WooCommerce to sell online products then it would be a good idea to have the plugin integrated with Google Analytics to have access to better reports. Reports are very important especially if you promote your store on different online channels and you want to see the revenue that every channel is bringing.
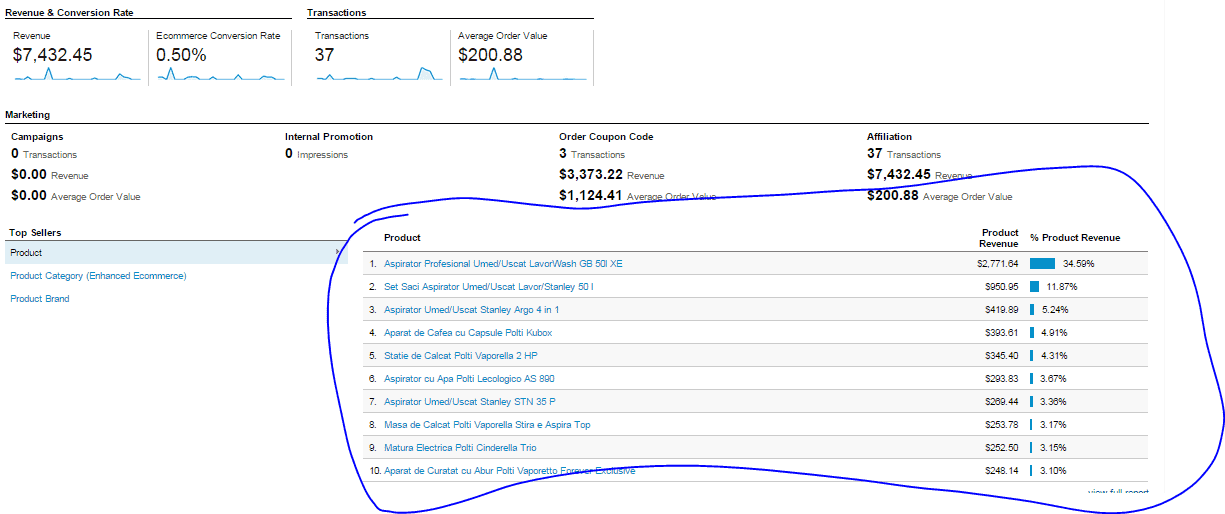
Google Analytics made it possible for some time to integrate your eCommerce platforms to it to have enhanced reports. Below you can see some of the information that you can study in Google Analytics (if you are not convinced yet about the benefits that Analytics have):

Every platform offers this feature but with Google Analytics you can use it with the other tracked details to create advanced reports.


These are the standard reports that you can have if you integrate the ecommerce platform with Analytics. Below I will put the steps that you need to follow to have Google analytics integrated with your WooCommerce store.
To integrate WooCommerce with Google Analytics we use a free plugin: Enhanced E-commerce for Woocommerce store that will help link the ecommerce site with Analytics and have the above information into your Analytics dashboard. There are also other Yoast plugin that has more features, but this costs money. In this tutorial I will show how to install and configure the free plugin Enhanced E-commerce for Woocommerce store .
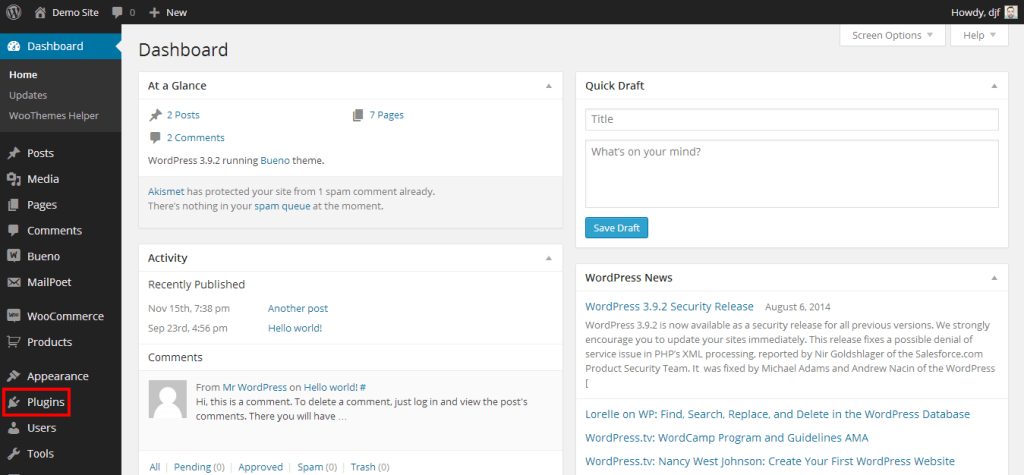
Step 1. >> To install the plugin, head to the Dashboard and choose “Plugins” from the sidebar to the left.
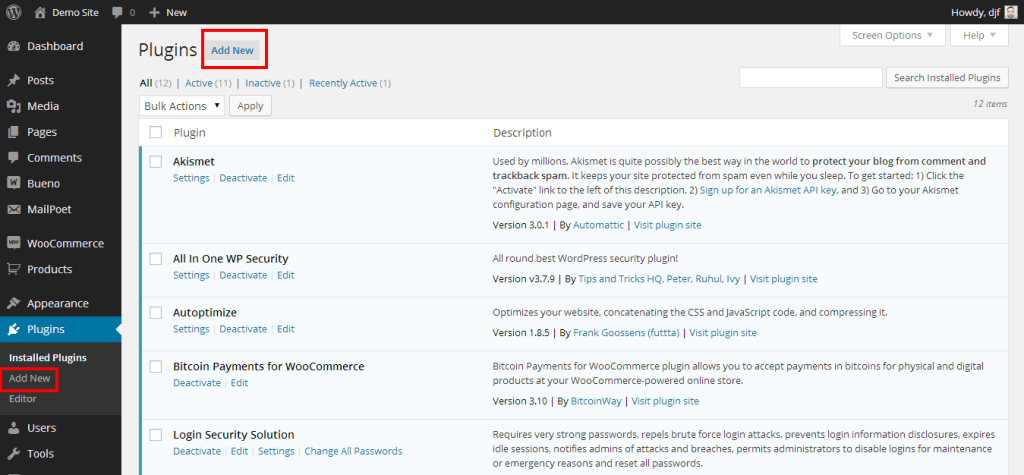
Step 2. >> On the Plugins page, click on “Add New”, either from the top of the page or the dropdown menu from the sidebar under “Plugins”.
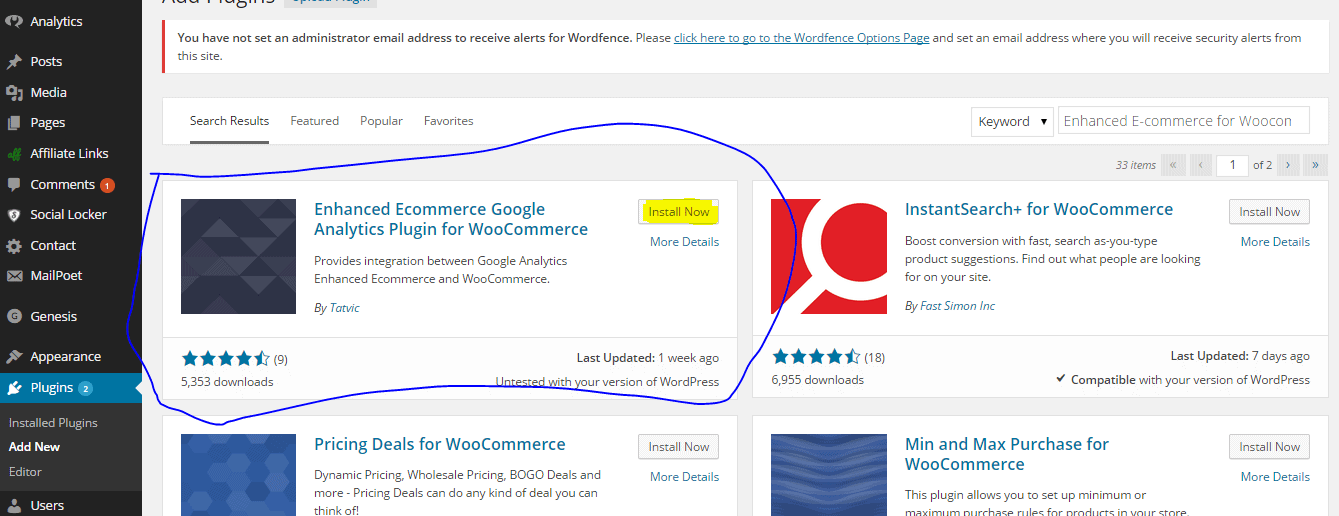
Step 3. >> Type in “Enhanced E-commerce for Woocommerce store” or similar into the search box and hit “Enter”
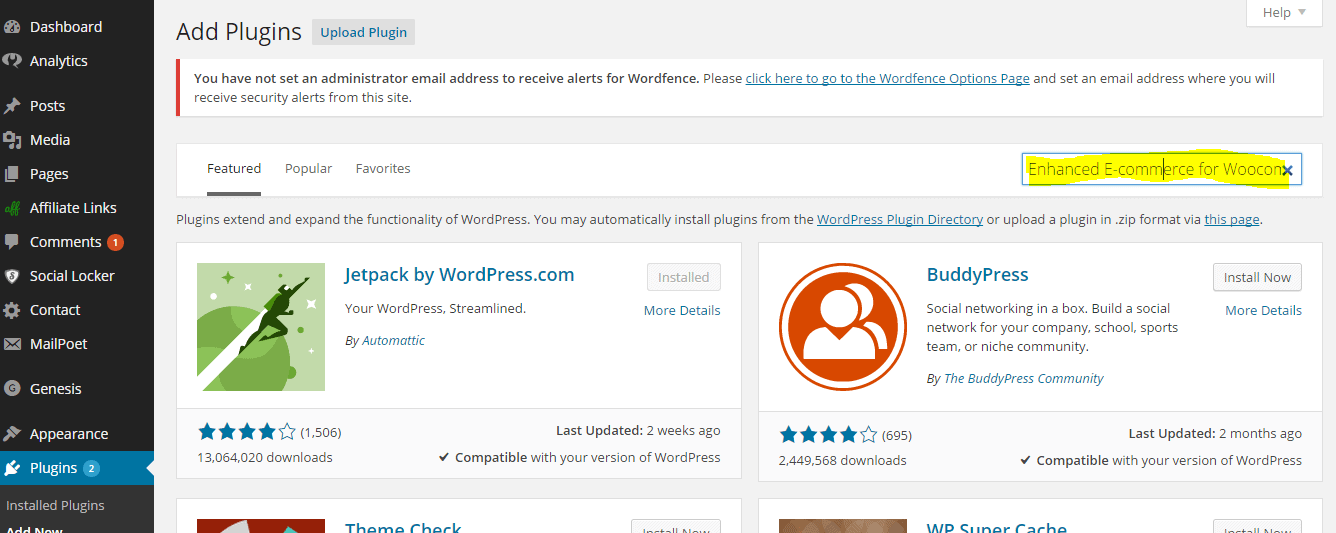
Step 4.>> Scroll down the search results until you find the plugin you need and click “Install Now”. Read the description to the right or click “Details” first if you feel you need more info first.
Step 5.>> Once the plugin has unpacked and installed, you simply need to click “Activate Plugin” and you’ll be ready to go
Step 6.>> To find your Google Analytics settings, head the sidebar of your Dashboard and click “WooCommerce >> Settings >> Integration”.
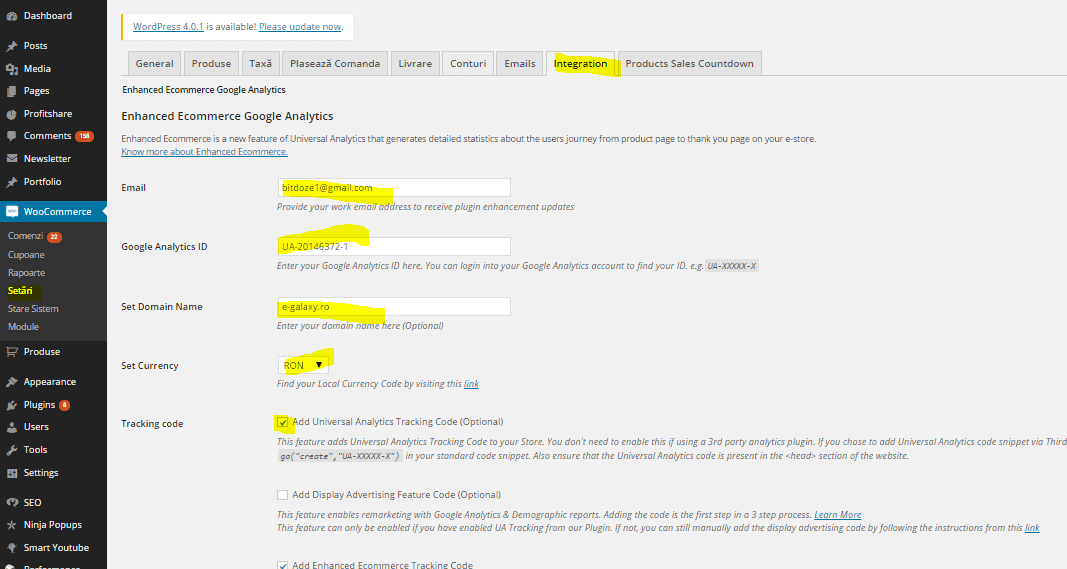
Step 7.>> Configure the plugin with your details and hit “SAVE”
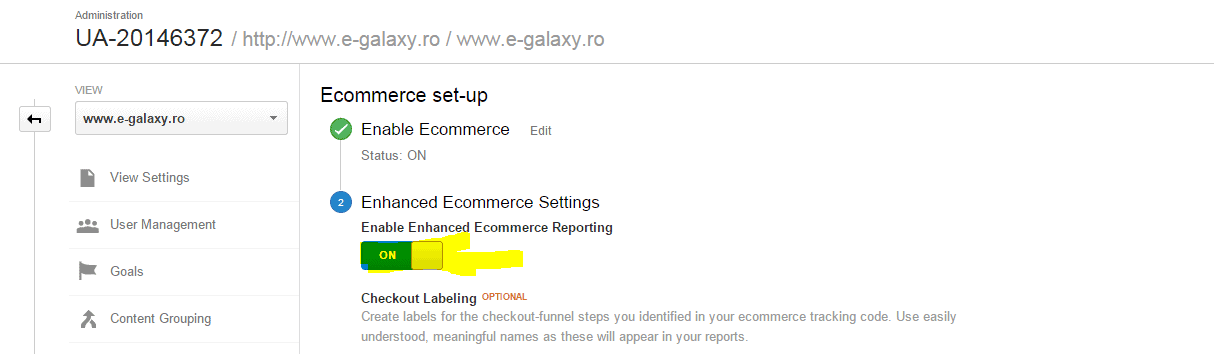
Step 8. >> Activate the ecommerce option in Google Analytics
– Go to Admin and choose the account for which you want to activate it. Hit the Ecommerce setings in the View area:

– Put the On active for ecommerce and hit submit.
That’s all you have to do! After this you just navigate into Analytics and check the reports to see if the data starts to come.
Tirth says:
Hello all,
Nicely presented about the Analytics integration!
You must also go through this plugin for your enhanced analytics:
WooCommerce Enhanced Ecommerce Analytics Integration With Conversion Tracking
Bhumi says:
Good read! Thank you for the great post.